Archive
This post is archived and may contain outdated information. It has been set to 'noindex' and should stop showing up in search results.
This post is archived and may contain outdated information. It has been set to 'noindex' and should stop showing up in search results.
How To Record The Screen & Upload It To YouTube On Windows
Aug 20, 2014WindowsComments (5)
Here is one way that you can record the screen, including audio, and upload it to YouTube for free. This is useful for recording game footage, creating a presentation, or showing how to perform some task on the computer.
Start by downloading Microsoft Expression Encoder 4. This software package includes the encoder and screen capture tool.

Go through the software installation as you normally would. Once installed, there will be two shortcuts in your start menu. One is called "Microsoft Expression Encoder 4 Screen Capture", which is the tool you will use to capture the screen. The other is "Microsoft Expression Encoder 4", which is the program that converts the screen capture into a video suitable to upload to YouTube. You can ignore the SDK folder.

Once you're ready to record something, open up the "Screen Capture" application.
Once you have the Screen Capture application open, you should see a little window that looks like this:

Click the options cog button to bring up the options menu:

On the "Screen" tab you'll want to adjust the Frame Rate to something more usable like 30 or 60 (defaults to 15). And decide if you want to capture the mouse pointer or not:
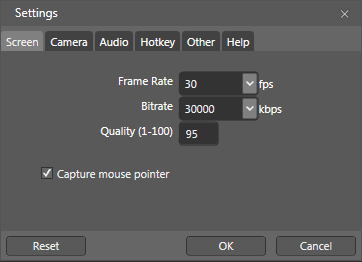
On the "Audio" tab, be sure to check the audio device you use for audio output (so that it records the output). On most computers this will be "Stereo Mix", but it can vary depending on the audio hardware you have. Once set, click OK.
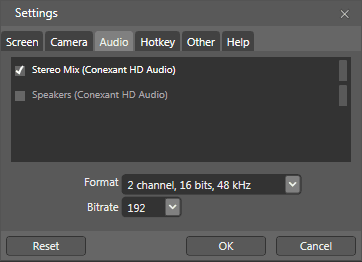
If you're unsure what audio device you should use, open up the "Sound" control panel in Windows and check the "Recording" tab. This can be accessed in the Control Panel link in the start menu. It should show your audio hardware and have a checkbox next to the one used for recording (you can change it to the same as device that you use for audio output).
If you have a mic that you want to use instead, be sure to select that.
Once you're ready to record, click the red recording button.

The screen will now have an overlay where you can select the area that you want to record.

Highlight the area you want to record. You can also select a preset resolution and then move the recording area around.
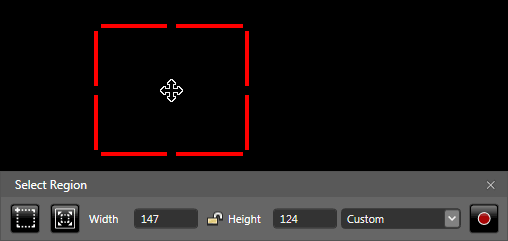
Once you have the area selected, click the red recording button one more time. There will be a 3 second countdown and then it will start recording.

Once you're done, click the stop button.
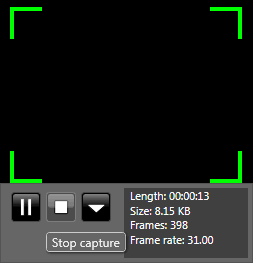
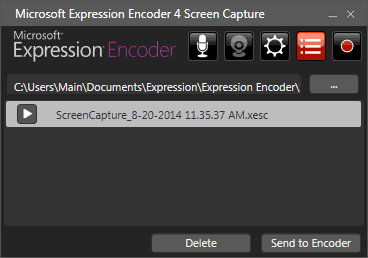
The Screen Capture window will come back up and show the recording you just took. Click the "Send to Encoder" button.
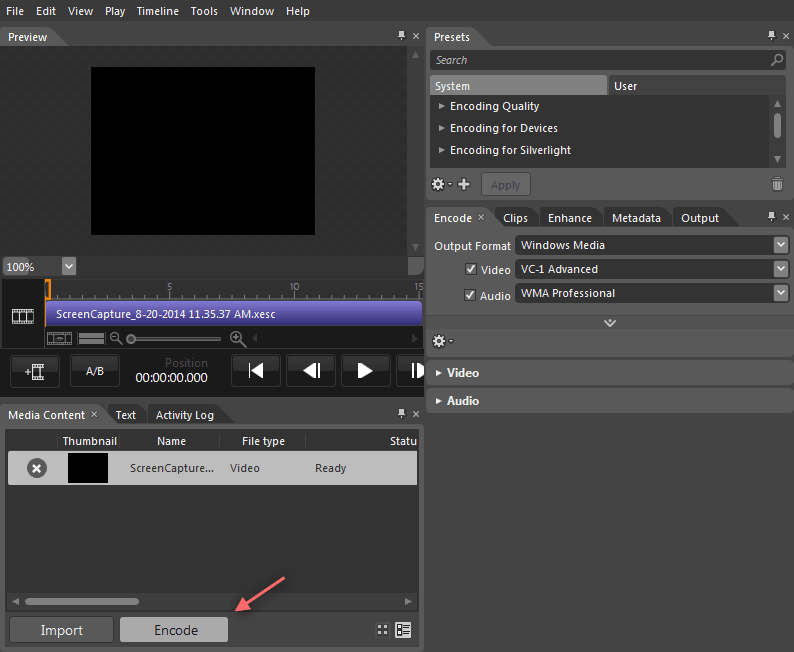
The encoder application will open, which looks like a typical movie creator program. You don't need to do anything in this program other than click the "Encode" button at the bottom.
Once done, the completed video in WMV format (Windows Media Video) will be placed into the following folder:
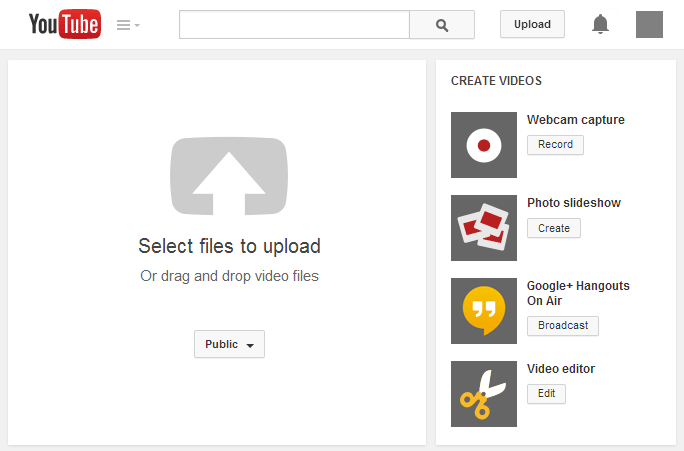
Now all that's left to do is to log in to YouTube, click the Upload button, and select the file to upload.
Step 1: Download
Start by downloading Microsoft Expression Encoder 4. This software package includes the encoder and screen capture tool.

Step 2: Installation
Go through the software installation as you normally would. Once installed, there will be two shortcuts in your start menu. One is called "Microsoft Expression Encoder 4 Screen Capture", which is the tool you will use to capture the screen. The other is "Microsoft Expression Encoder 4", which is the program that converts the screen capture into a video suitable to upload to YouTube. You can ignore the SDK folder.

Once you're ready to record something, open up the "Screen Capture" application.
Step 3: Configuration
Once you have the Screen Capture application open, you should see a little window that looks like this:

Click the options cog button to bring up the options menu:

On the "Screen" tab you'll want to adjust the Frame Rate to something more usable like 30 or 60 (defaults to 15). And decide if you want to capture the mouse pointer or not:

On the "Audio" tab, be sure to check the audio device you use for audio output (so that it records the output). On most computers this will be "Stereo Mix", but it can vary depending on the audio hardware you have. Once set, click OK.

If you're unsure what audio device you should use, open up the "Sound" control panel in Windows and check the "Recording" tab. This can be accessed in the Control Panel link in the start menu. It should show your audio hardware and have a checkbox next to the one used for recording (you can change it to the same as device that you use for audio output).
If you have a mic that you want to use instead, be sure to select that.
Step 4: Capture/Record
Once you're ready to record, click the red recording button.

The screen will now have an overlay where you can select the area that you want to record.

Highlight the area you want to record. You can also select a preset resolution and then move the recording area around.

Once you have the area selected, click the red recording button one more time. There will be a 3 second countdown and then it will start recording.

Once you're done, click the stop button.

Step 5: Encoding
The Screen Capture window will come back up and show the recording you just took. Click the "Send to Encoder" button.

The encoder application will open, which looks like a typical movie creator program. You don't need to do anything in this program other than click the "Encode" button at the bottom.

Once done, the completed video in WMV format (Windows Media Video) will be placed into the following folder:
C:\Users\USERNAME\Documents\Expression\Expression Encoder\OutputStep 6: Upload
Now all that's left to do is to log in to YouTube, click the Upload button, and select the file to upload.
